JAIX WMS - Stocktake
Overview
Overview | A stocktake job can be completed within the warehouse |
|

Creating a new Stocktake job
Overview | Stocktake jobs can be created by Location, Debtor, or entire Warehouse |
| |
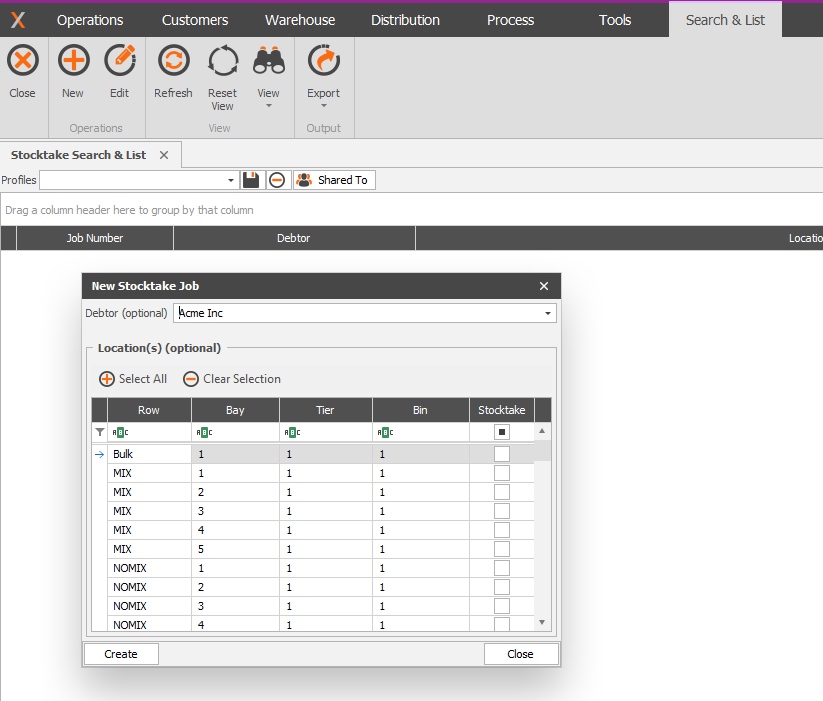
To Create a new Stocktake Job, open Stocktake Search / List and select New to open the New Stocktake Job Window | |
Entire Warehouse | Select Create, and confirm that the entire Warehouse is to be added to the stocktake job. This will create a Stocktake for all Warehouse locations, including all Products from all Debtors. |
By Debtor | Select the Debtor to Stocktake and select Create. This will create a Stocktake for all warehouse locations, including all products from the selected debtor. If required a Debtor Stocktake can be further filtered to specific locations using the checkboxes in the Locations grid. Simply select the locations to add to the Stocktake Job before selecting Create. |
By Location | To Stocktake specific locations select the required Locations from the Locations Grid and select Create. Use the filter row to assist in location selection if required. A single or multiple Locations may be selected. |
Print / Export
Overview | Once a Stocktake job has been created it can be printed / exported |
| |
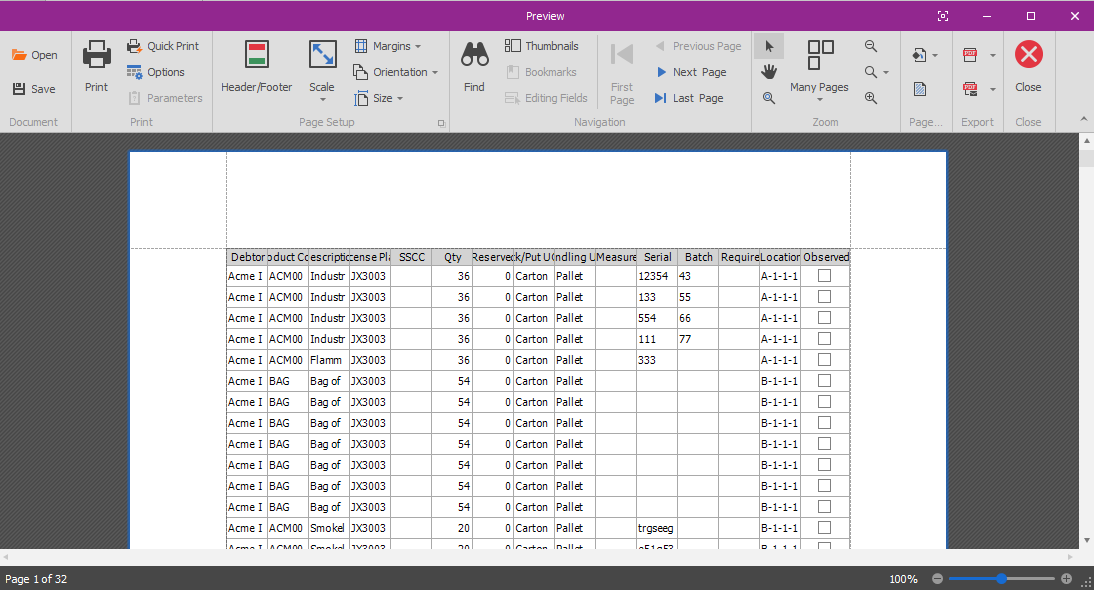
Select Print from the open stocktake job to open the Stock Grid data in the print preview window | |
| |
Format | Use the toolbar controls to format the report before printing, or export if required |
Export> |
|
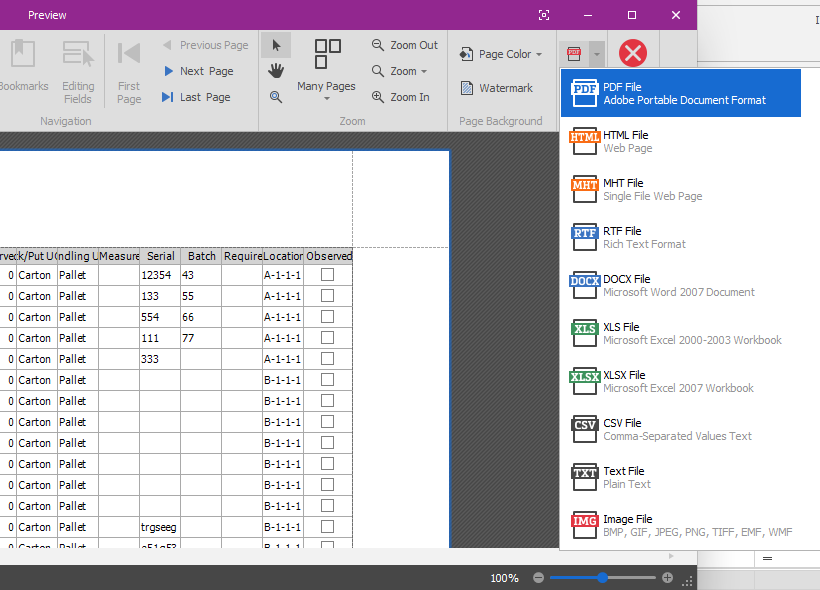
Export Options | From the Print Preview window the data can be exported to other formats / applications |

Undertaking the Stocktake
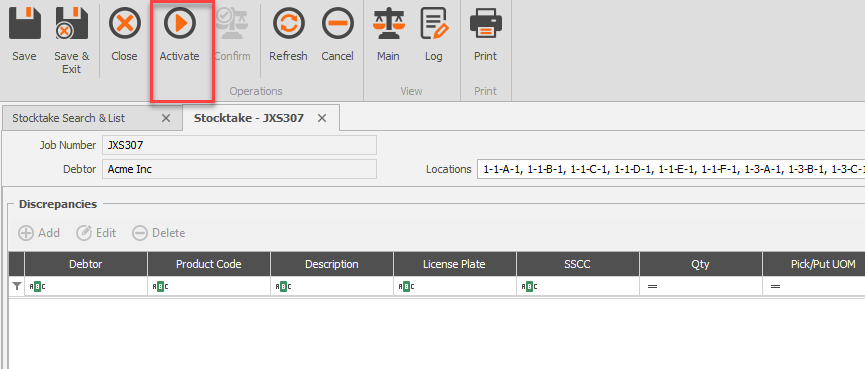
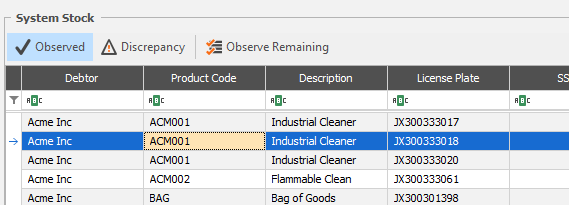
Overview | The Stocktake Job screen is divided into the upper “Discrepancies” section and the lower “System Stock” section. The System Stock grid lists all Licence plates for the Stocktake Job. Each licence plate will need to be observed before the stocktake can be completed |
| |
Note: Once a stocktake Job has been activated all Licence Plates on the job will be locked for operational use and show in purple text on Allocations, Adjustment and Relocation Screens. | |
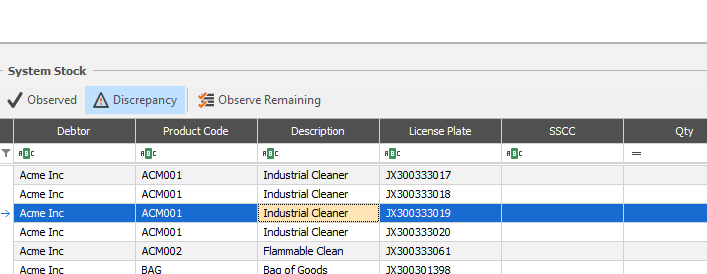
Logging Discrepancies | Where details recorded against the Licence plate are determined to be incorrect a Discrepancy must be logged. Select the line requiring correction in the System Stock grid and select Discrepancy |
|
|
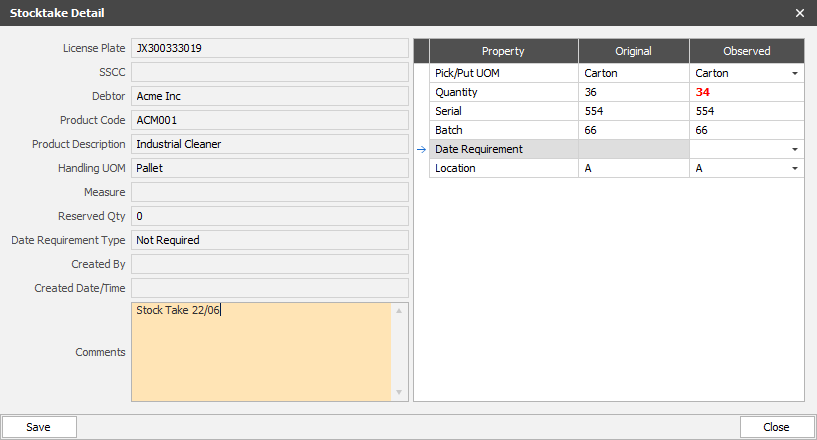
Stocktake Detail Window> |
|
| The stocktake detail window displays all information associated with the Licence plate. The grid on the right displays all of the details that can be adjusted during the stocktake. Update the details here to reflect the actual stock, and add a comment if required before saving. Adjusted details will show in red in the Stocktake Detail window. Comments added will be able to be seen in the track movements screen after the Stocktake is confirmed. |
Note: Dates will only be adjustable if they are enabled for that product. E.g. a date cannot be added/changed for a product that has date requirement set to not required. | |
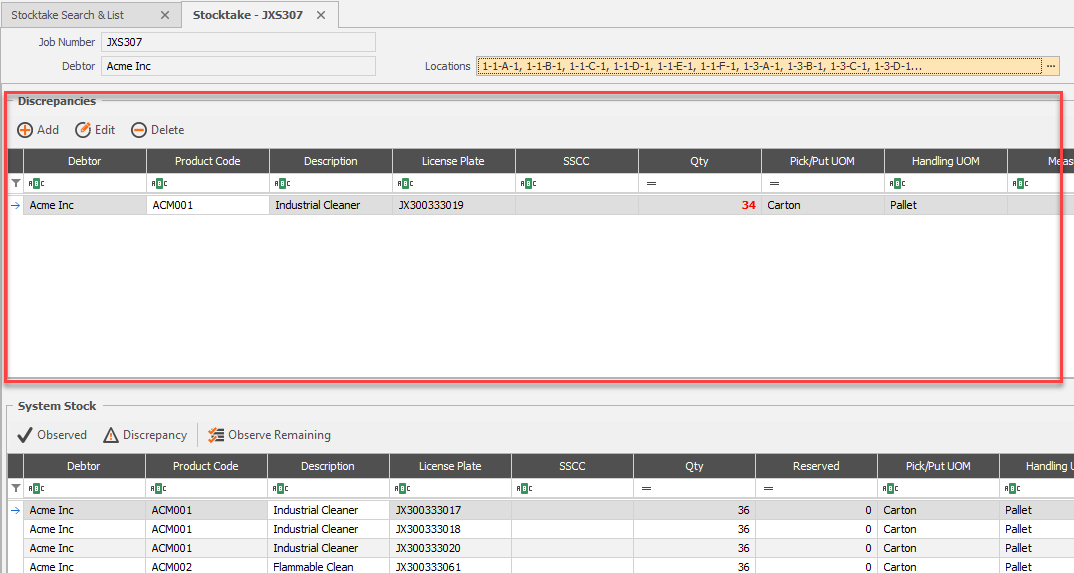
Discrepancies | Once a discrepancy has been saved the Licence plate will move to the upper Discrepancy grid, with the changes made reflected in red. |
| |
Observing Stock | Licence plates that have been checked and deemed to be correct must be Observed before the Stocktake can be completed. To Observe a Licence plate select the line, then select Observe or double click on the line. An Observed Licence plate will display green and move to the bottom of the System Stock grid.
|
Observed Pallets> |  |
Observe Remaining | Once all Discrepancies have been logged the option is available to Observe Remaining. Select to observe all remaining Licence plates in the System Stock grid |
Confirm | Once all Licence plates have either been observed or logged as a discrepancy the Stocktake Job can be Confirmed. Confirming the stocktake job will automatically update all details of logged discrepancies and release the stock for operational use. |