
JAIX WMS - Measure Operations
Measure Operations
The Measure Operations screen in WMS can manage the workflow of picking measured units stored within the Warehouse.
Setup
Location Setup
Measuring Area Location
Set up Bulk Stack Locations for the Measuring Area(s). This could be either an in and an out location, or just a single location dependant on the required workflow. Print location labels as required to display at the Measuring Area.
Outwards Bins
Outward bins can be set up if required. If Custom Pick Workflows are enabled for a product and a user scans an Outwards Bin when prompted for the Next location, the Pick will confirm instead of relocating.
Product Setup
To enable Relocations of products from the SmartSCAN devices within the picking process Custom Pick Workflows will need to be enabled for products.
From the Product Record open Site Options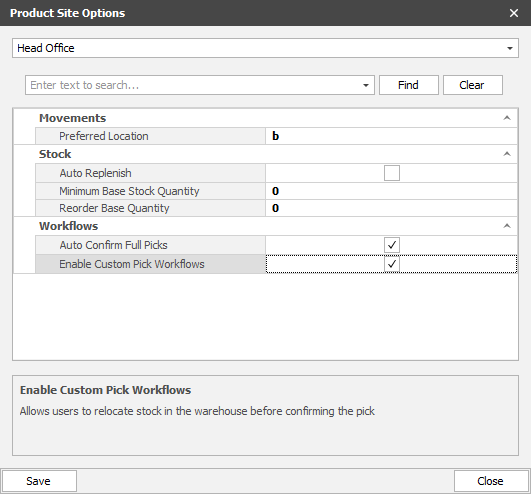
- Enable Custom Pick Workflows
- When enabled a product scanned from a pick docket will ask for the Next Location instead of confirming the pick straight away. Products can be moved as many times as required to fulfil the workflow requirements.
- Auto Confirm Full Picks
- When a Pick is to fully exhaust the quantity of a License Plate it will auto confirm upon scanning instead of asking for the next location. (Custom Pick Workflows must be enabled before Auto Confirm can be enabled)
Docket Creation
Docket Created
Pick dockets are created via Desktop Entry, EDI or Web Portal
Docket Items Allocated
The required Items are allocated to the docket
Docket Available for Pick
Once allocated, the docket will be available for pick on the SmartSCAN devices
Product Relocation to Measure Area
Log onto Docket
SmartSCAN users log onto the allocated Pick Docket on the SmartSCAN device and is presented with a list of required picks grouped by storage location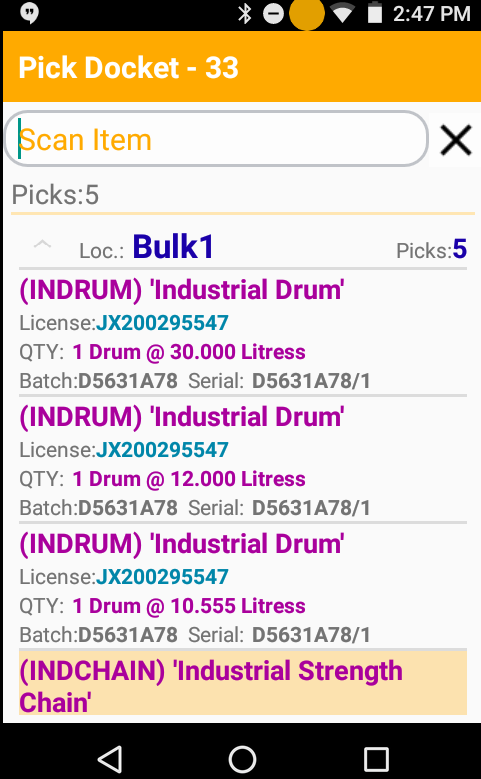
Scan License Plate
SmartSCAN user proceeds to Storage Location, identifies the correct item to be picked and Scans the License Plate
Relocate Item
SmartSCAN device presents the Custom Workflow screen and asks for the Destination Location to be scanned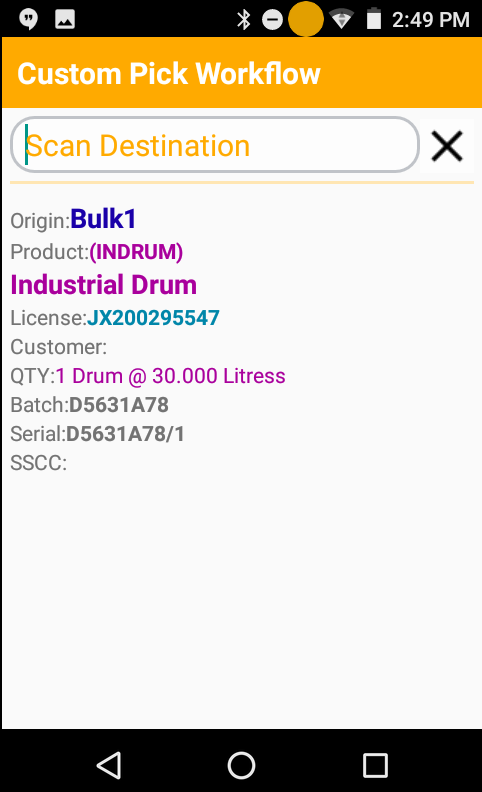
Scan Destination Location
When the Destination Location is scanned the License Plate is relocated to the New Location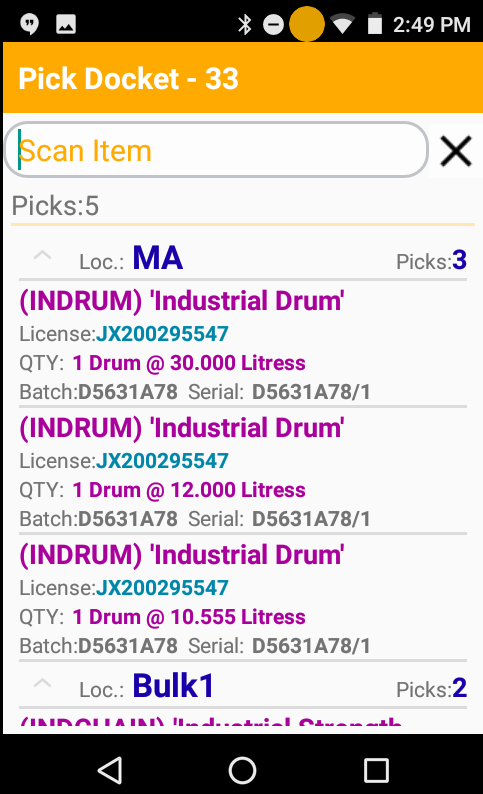
Scan Next Docket Item
The above process is repeated until all License Plates on the docket have been moved to the required Destination(s)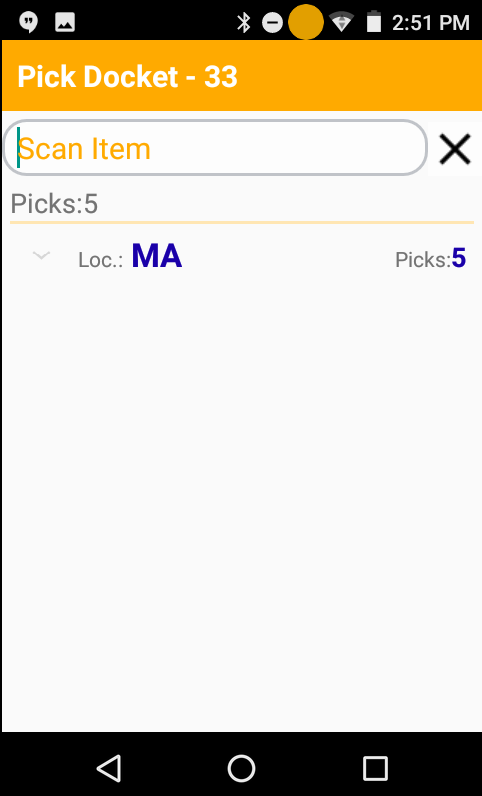
Exit Docket once all Docket Items located in correct Area
When all Docket Items are located in the required location(s) the user exits the docket, and moves on to the next docket
Measure Operations
Measure Operation Screen
The Measure Operations Screen displays all License Plates help within a location and show the measures required against each license plate. Open the Measure Operations Screen from Operations > Measure Operations > Measure and select the required location on the pop-up Toolbar. The Measure Operations Screen will always load the last selected location for the logged in user upon opening.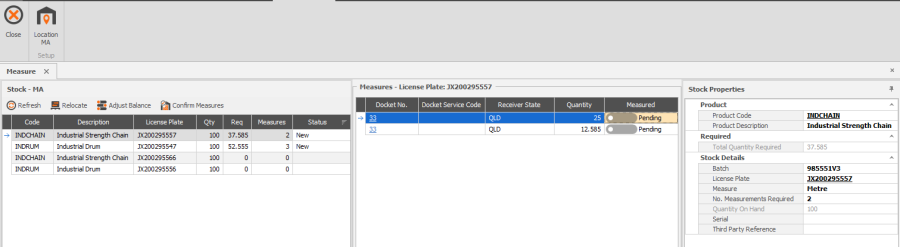
There are three panes within the Measure Screen
- Stock
- Displays a list of All license plates held within the selected location
- Measures
- Shows all measures required against the License Plate currently selected in the Stock pane, and provides an indicator to visually manage which measurements have been completed
- Stock Properties
- Displays product details for the License plate currently selected in the Stock pane
Users can navigate between the panes using the arrow keys and update Licence Plate Measures from Pending to Confirmed using the Space Bar.
Identify Item to be measured
Identify the items to be measured from the physical stock that is held within the measuring location. Select the License plate in the Stock Pane on the Measures Screen to see details of the required measures.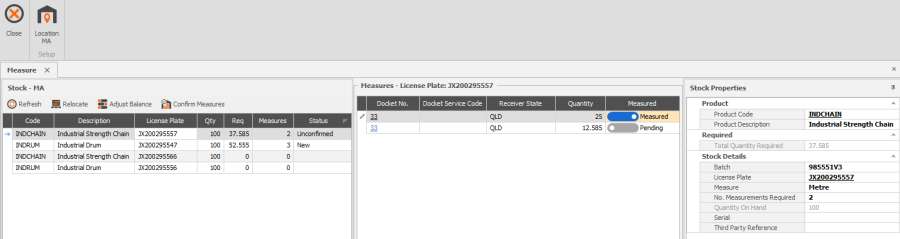
Physically Measure Item and Update Status
Physically measure the item and toggle the corresponding measure from Pending to Measured.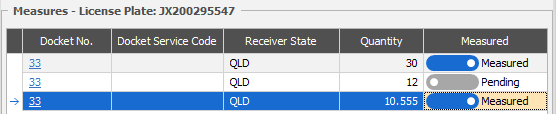
Confirm Measures
Once all measures against a license plate have been completed and marked as Measured, the Docket Items can be confirmed from the Stock Pane by selecting Confirm Measures. This will confirm the docket item on the Pick Docket and prevent any further changes being made to that item on the docket.
Adjust Balances (if Required)
If there is any remaining quantity against a License Plate after all measures are complete they will be moved to the bottom of the list in the Stock Pane. Select Adjust Balance to update the remaining quantity if required.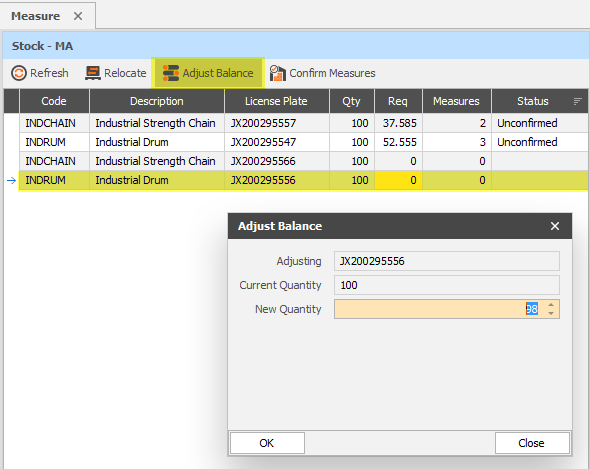
Product Relocation to Storage Area
- SmartSCAN Relocations
Open "Relocations" on SmartSCAN Device
Select Relocations from the SmartSCAN device Menu
Scan License Plate
Scan the License plate to be relocated
Scan Storage Location
Scan the required Storage Location
Repeat As Required
Scan next License Plate and repeat as required
- Manual Relocations
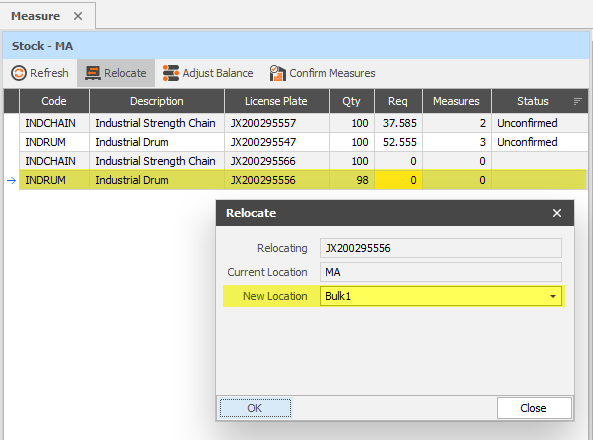
Select License Plate on the Stock Table
Select the License Plate that is to be relocated
Select Relocate
Select Relocate from the Toolbar in the Stock Pane and enter the New Location for the License Plate