JAIX Reports Design - Advanced
Introduction
This document contains reference material to be used in conjunction with the Reporting – Level 2 Standard Training Module. This STM is focused on more advanced functions within the Report Designer itself.
The topics covered here will allow users to create their own custom Reports using Data Sources designed based on the needs of the individual report. Expressions will also be covered in greater detail along with the logical, and data specific tools required to perform complex changes based on a series of functions or checks.
JAIX Report Designer is using the DevExpress Toolset.
Please see their official documentation for additional information.
https://devexpress.github.io/dotnet-eud/interface-elements-for-web/articles/report-designer.html
Glossary
Label | Any field that displays either text or information from the database |
Data Source | The collection of fields usable within the report/form |
Data Member | The sub-group of fields that the report/form will generate rows from |
Binding | Connection between a Label and the information from the database |
Expression | A way to expand on a simple binding with additional fields and functions |
Format String | How the report/form should present a Label. Example date format string dd/mm/yyyy |
Band | Term to identify the horizontal sections of a report/form. |
Detail Report | Self-contained report within the parent report/form |
Advanced Expressions
Expression Editor
There are multiple ways to access the Expression Editor depending on what is required. Example: Select a Label, Click the small blue arrow in the top right corner. Within the Expression field, select the three dots icon. This will open the Expression Editor, which allows users to change the binding of a Label. There is a high amount of customization that can be completed using this function. 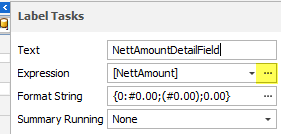
Expression Tools
- Fields – This will list every field within the Data Member selected against the parent Detail Report
- Report Items – This will list all Report Bands including Headers, Footers and Detail. Expanding a section will also list all Labels and Objects within
- Variables – There are two hardcoded variables to select here;
- Row Count – Total number of records within Detail Band
- Current Row Index – Current record number within Detail Band
- Constants – There are three hardcoded constants to select here;
- True
- False
- ? – This will return NULL. It will not refer to anything and can be used to make no change for formatting expressions
- Operators – This contains all basic mathematical functions for field comparison.
Functions
There are a number of functions that can be used to manipulate the data presented. Functions are grouped based on the data type being worked with.
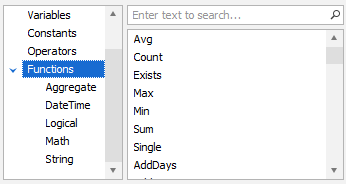
The Function Sub-Groups are:
- Aggregate – To perform actions on a group of fields. Most commonly used in conjunction with Group Footers
- DateTime – To manipulate DateTime values. Users can modify dates, confirm the date of the week etc.
- Logical – Ability to check if clause is true, then perform an action. Also to check for empty fields
- Math – More advanced mathematical functions, and ability to convert fields to numerical data types
- String – Ability to manipulate text in almost any fashion.
- Trim() – Remove leading and trailing spaces
- Len() – Find the character length of the string
- Upper() – Convert the string to uppercase
- CharIndex() – Find location of specific string within field
A few of the more notable Functions are:
- Iif() – Can check if something is true, and then perform different actions based on the result of that check
- CONCAT() – Allows multiple fields to be merged into one
- SUM() – Adds all values of that field together
- NOW() – Provides the current DateTime
Format Strings / Font Changes
Almost every option can have an expression attached to it. The small square icon to the right of each setting will open an expression editor specifically for that setting. Any setting with a current active expression will display a cursive ƒ.
Clicking this F will prompt the user to either Edit the Expression or Reset the Expression. 
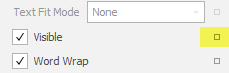
Visibility
Select the Object you would like to hide under specific circumstances.
Click Properties > Behaviour > Visible – Small icon to the right
This will open the Expression Editor which will allow the user to define when the Object is visible.
Example: Iif([IsPickup]=1,False,True) – This will hide the Object if the Consignment being reported is a Pickup record.
Calculated Fields
Right-Click any Data Member within the Field List on the right to create. These are fields that generate based on a custom Expression. If you intend on using the same expression for multiple Labels, creating a Calculated Field will allow you to enter the expression once and then bind Labels directly. 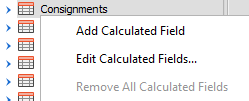
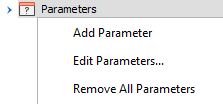
Parameters
Fields that are used for user entry. These can be displayed to the user within the Options menu when generating a Report. The values entered can then be used to filter the data presented. Right-Click the Parameters Data Member within the Field List on the right to create.
|
|
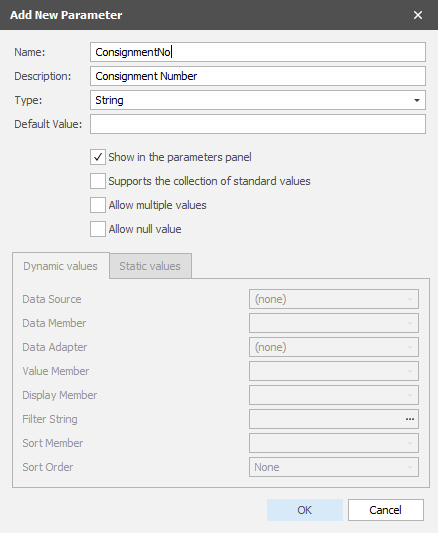
- Name – Displayed in Report Designer
- Description – Displayed within Options Menu
- Type – Data Type. String for standard text.
- Default Value – Auto populated with this value
- Show in Parameter Panel – Will still be visible after report has been generated on left panel
- Supports the Collection of Standard Values – This will unlock the bottom half. Allowing a Static list of values to be entered, or to bind the list to a Data Member. If bound to a Data Member, each unique value from that table will be listed.
- Allow Multiple Values – Allows the user to select multiple options
- Allow Null Value – Allows the user to not select anything
Parameters can be used within expressions to modify visibility or formatting within a report. Alternatively a Parameter can be used to filter a Data Source directly. This only functions for custom Data Sources which is covered later in this document.
Custom Data Source
Create New Data Source
Creating a new Data Source allows the user to define exactly what fields are required for a Report / Form. It also allows the user to incorporate additional tables that may not be populated within the JAIX Standard Templates.
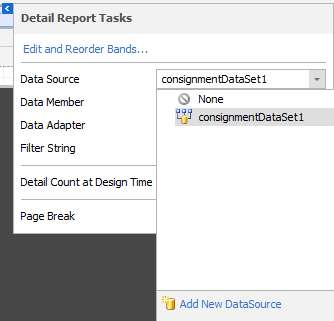
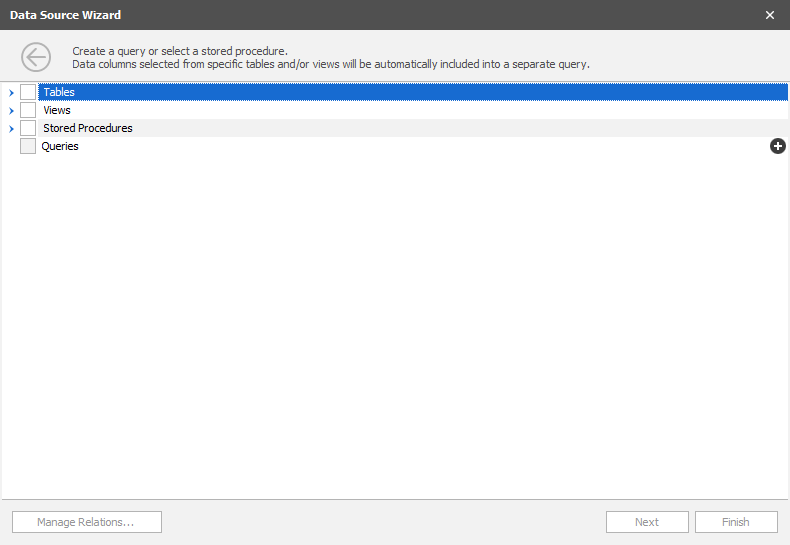
Select an existing Detail Report, click the blue arrow, select the Data Source drop-down menu and click "Add New DataSource".
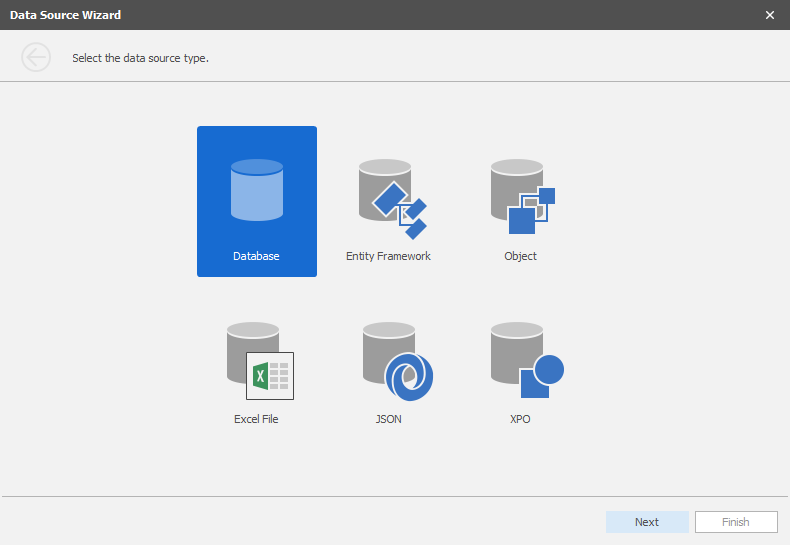
This will open the Data Source Wizard.
Select "Database" as the Data Source Type.
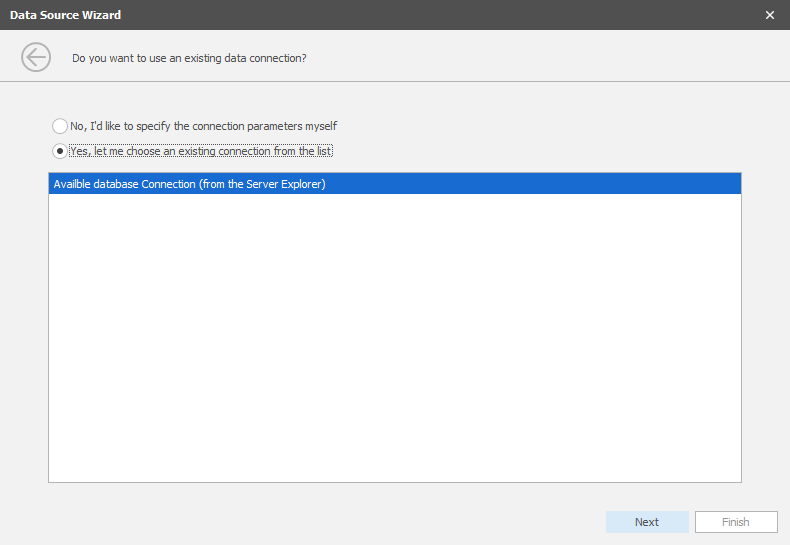
Let the Wizard select the Database for this custom query.
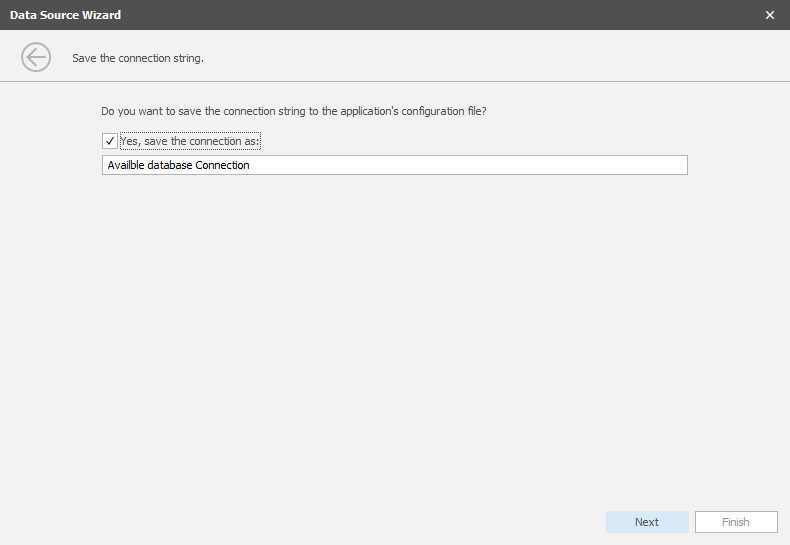
At this point the user can save the Database Connection.
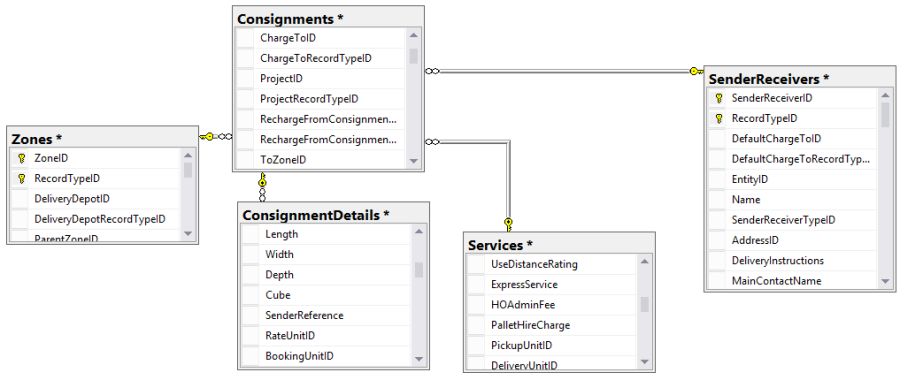
From here, the Tables required for the Data Source can be selected. It is highly recommended that only a single table is selected at this point.
The Query Builder can then be used to tailor the Data Source to user requirements without populating all fields.
This is in order to maintain high performance when generating the report.
Query Builder
Once a custom Data Source has been created, the query that controls what fields are available can be modified using the Query Builder. To open the Query Builder, right-click a custom Data Source and select Manage Queries.
This will show the list of Queries. Under most circumstances, a single query (Data Member) will cover all requirements as a single Detail Report can only be bound to one Data Member.

Click the three dots on the right-hand side of the new custom query.
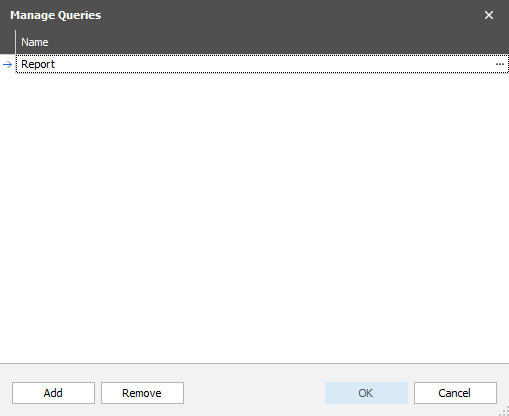
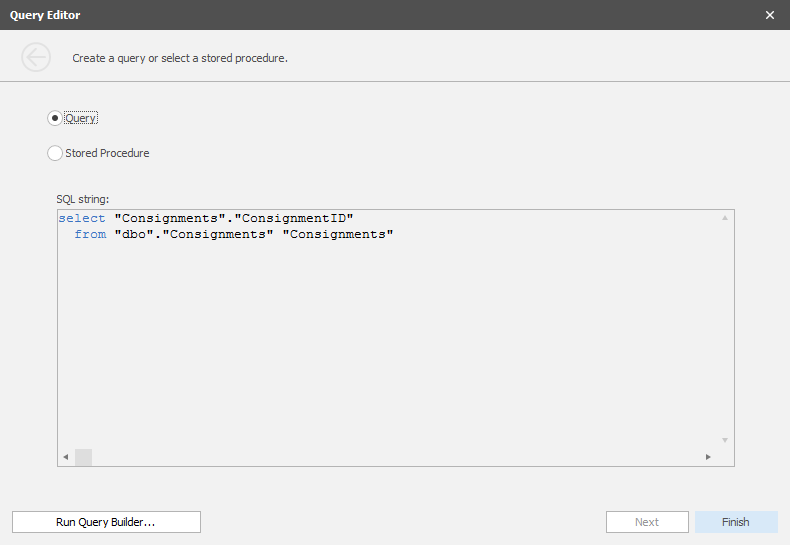
Click "Run Query Builder"
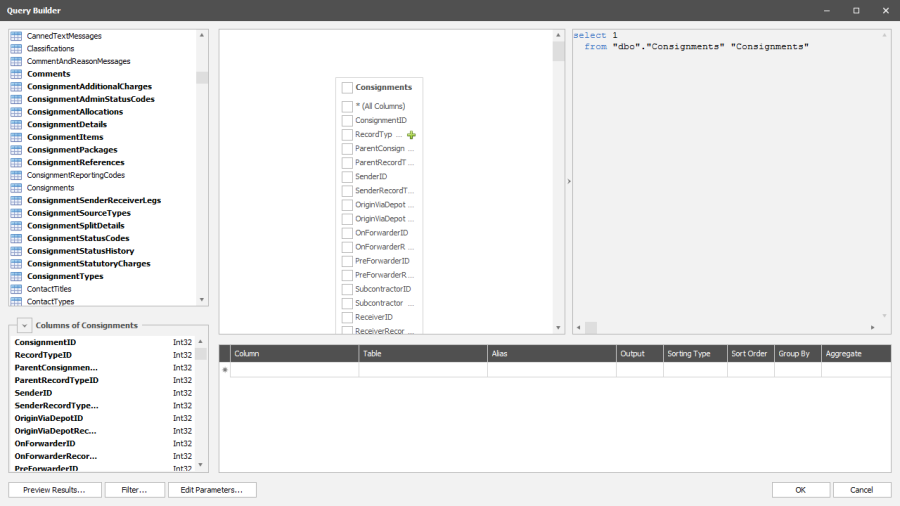
From within the Query Builder, users can double click tables within the left panel which will add them to the central panel. Only tables that have a link can be added, and that link must be defined. Each column added will increase the number of fields that can be populated. Use the tick boxes to mark fields as populated. They will then be added to the SELECT statement automatically generated in the right panel along with a record added to the bottom panel.
From here users can map out all fields required for the report.
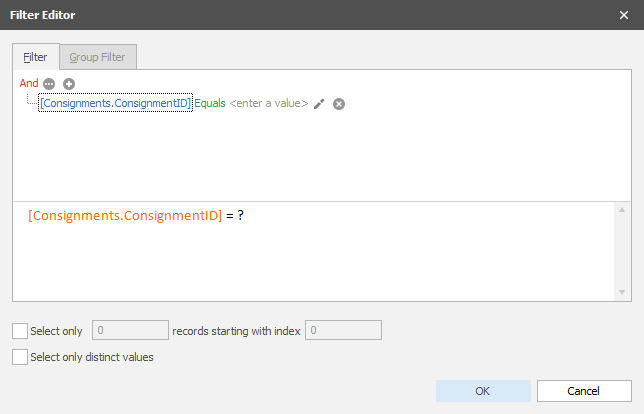
Query Filter
Clicking the Filter icon within the Query Builder will open an interface to define filters required for the custom Data Source.
Clicking on individual components of the filter will allow the user to define how the filter is applied and to what fields. Any field within the joined tables can be selected for comparison. The comparison type can be modified as required and the comparison "to" includes hardcoded values, any field within the joined tables, or a custom parameter value.