Debtor Classification for Allocations
Debtor Classifications allow users to classify debtors, which can then be used as a simple colour reference to visually assist users (in particular allocators) of various requirements. For example users can be classified as 'Cash Only', whereby the allocator may give any job associated to that class to company fleet, or 'VIP', letting the allocator know straight away that a job is of high importance.
Classification Setup:
JAIX Accounts > Tools > System Setup > Debtors > Classifications
This will list all the classifications already set up, and allow users to add, edit and delete, by highlighting a row and selecting a control, or by double clicking on an existing Classification.
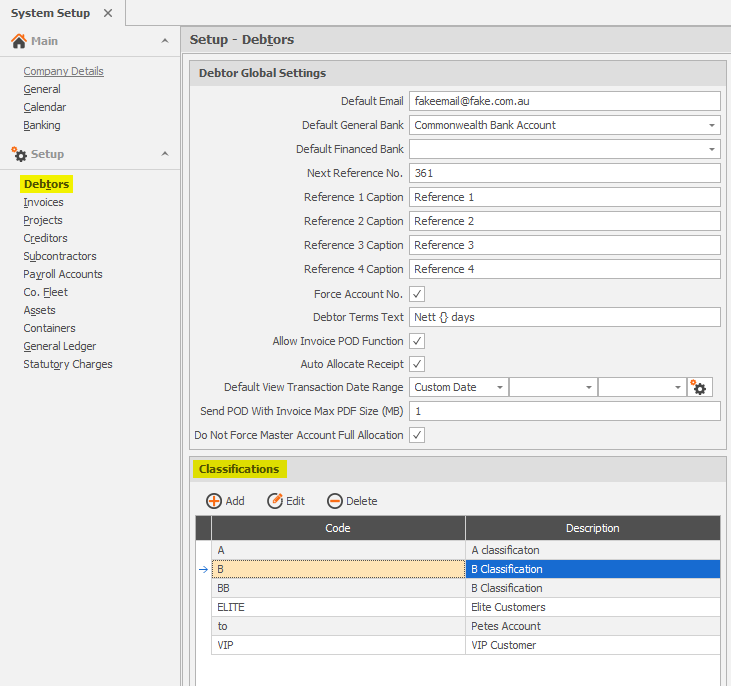

Once opening a specific classification, enter a code and description, and further notes below as required. Select a colour for that particular class (as to the allocator's requirements) and then by selecting the 'Display on Allocations Screen' flag, will determine whether the classification as a colour will display on the allocations screen.
Applying to Debtors
JAIX Accounts > Debtors > Main (Search & Setup)
Debtors can have classifications sets up through the debtors search and list screen. Once opening a debtor, select Master Details from the menu on the left. Classifications will display a dropdown list with all classifications set up in Tools > System Setup. None, all or multiple can be selected for any debtor, however only ONE classification with 'Display on Allocations Screen' ticked (in Accounts System Setup) can be selected for any debtor at a point in time. Once finished, save and exit. 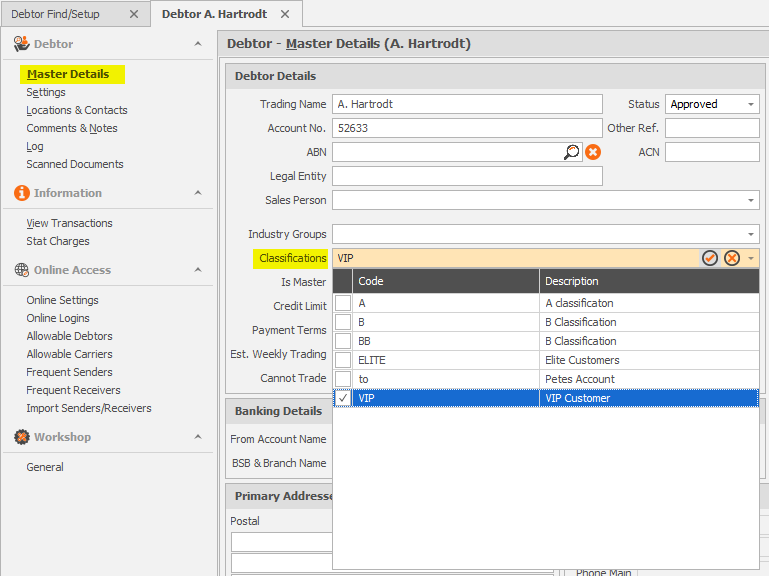
Functionality - Allocations Screen
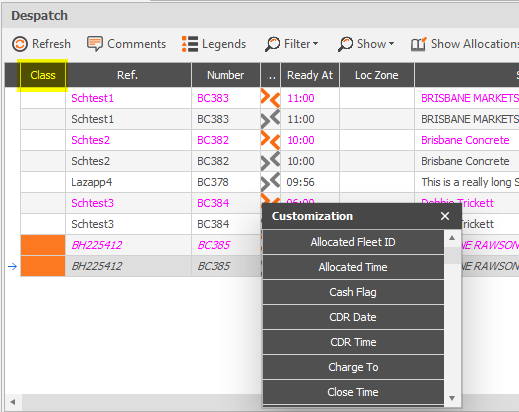
JAIX Freight > Distribution > Despatch (Allocations)
The allocations screen has a column 'Class' to display a selected class for a debtor for a consignment, job or pickup if required. This can be selected by right-mouse clicking anywhere along the column headings and selecting 'column chooser'. Scroll down to Class, and drag and drop along the column headings to where it best suits the user. This field will now display the colour that is set up in Accounts > Tools > System Setup. Below is a screenshot with the class column selected, with the bottom job marked as orange for VIP classification.
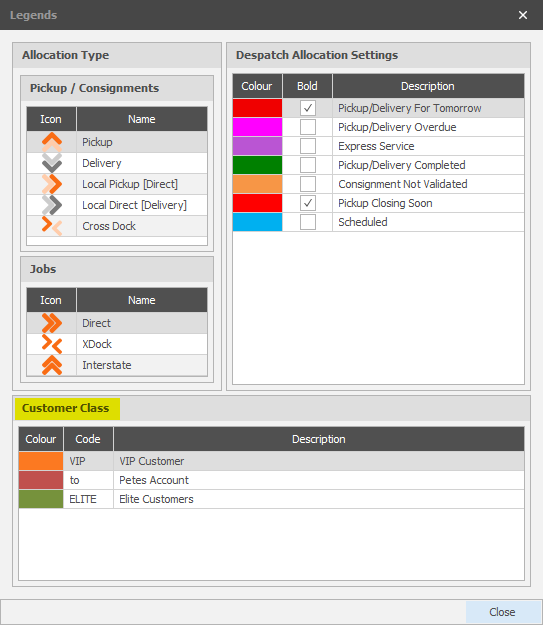
Selecting 'Legends' will also bring up which colours relate to which customer classes.